
You’ve either just bought a POS system or you’re about to. Now you need to get it running without losing a day of sales, mischarging customers, or discovering on go-live morning that the receipt printer won’t talk to the terminal.
Setting up a POS isn’t complicated, but the order matters. Skip a step like tax configuration or employee permissions, and you’ll feel it the first weekend. Do it right, and the system starts paying for itself within the first month.
The guide below walks you through every step in the order you should actually do them: what you handle yourself, what your vendor handles, and what to test before you ring up your first real customer. It’s written for new businesses, operators switching from an older system, and merchants opening additional locations.
Key Takeaways:
- Handle the paperwork before any hardware shows up. You need an EIN, a business license, a bank account, a merchant account, stable internet, and tax rates ready.
- Pick your setup path early. DIY fits small shops under 200 SKUs, while vendor-assisted onboarding suits regulated industries and larger catalogs.
- Follow the 8 steps in order. Start with hardware and power, then software, settings, products, payments, staff permissions, and integrations.
- Test every payment type before opening. Run cash, chip, tap, split, refund, and void scenarios so totals match your reports.
- Train staff with the store closed. Cover sales, refunds, and what to do when cards decline or printers jam.
Your Pre-Setup Checklist (Before You Touch Any Hardware)
Business license still pending. Merchant account application in review. Internet “scheduled to be installed” next Tuesday. Square these six items away before you start.
PRO TIP
If you haven’t picked a POS yet, start with our POS buyer’s guide first. The wrong system makes every step below harder.
1. Your business paperwork
You need an EIN, a valid business license, and a business bank account where card payments will be deposited. Your payment processor will ask for all three before activating your merchant account.
2. Your merchant account or payment processor
Your POS software records the sale. Your merchant account moves the money. You can’t process a card transaction without both. Understanding payment processing fees and structures upfront can save you thousands per year — especially if your POS lets you choose your own processor. If your POS is processor-agnostic (like KORONA POS), you can choose your own processor, which usually saves you money in the long term. Apply early; approval can take three to ten business days.
Payment processors giving you trouble?
We won’t. KORONA POS is not a payment processor. That means we’ll always find the best payment provider for your business’s needs.
3. Your internet connection at the location
Cloud-based POS systems need stable internet. Confirm the connection is live (not “scheduled”), runs at least 25 Mbps for a single register, and has a backup option (second ISP, 4G failover, or hotspot) tested before go-live.
4. Your power and counterspace plan
Walk the checkout area before any hardware arrives. You need a grounded outlet within reach of every device, a surge protector or UPS for the terminal and router, at least 18 inches of counter depth for a tablet setup, and clearance for the cash drawer to open fully.
5. Your tax setup
You can’t configure your POS until you know what to charge. Gather your state sales tax rate, any local taxes, special category rates (food, alcohol, tobacco, cannabis), and tax-exempt customer documentation if relevant.
6. Your existing data, if you’re switching
Export your product catalog (SKUs, prices, categories, vendor info), customer list (with loyalty and gift card balances), open purchase orders, and supplier info before you cancel your old POS. Most new providers will handle the import if you send a clean CSV.
DIY or Vendor-Assisted Setup?
Setting up a POS can mean two very different things. On one path, you sign up, plug in hardware, follow prompts, and figure out the rest yourself. On the other hand, a specialist from your vendor configures everything, imports your products, trains your staff, and stays on the phone during go-live.
Square, Shopify POS, and SumUp are built for DIY. Toast, Lightspeed, and KORONA POS offer vendor-assisted onboarding as standard. Pick the wrong path, and you either spend three weekends figuring out tax tables or pay for white-glove service you didn’t need.
DIY POS Setup: What You Handle Yourself
With DIY, you handle every step: account signup, hardware unboxing, software install, product import, payment processor connection, employee setup, and training. Expect 2 to 6 hours of active work for a basic setup, free and bundled into your software subscription.
DIY is the right path when:
- You run a single location with fewer than 200 SKUs
- You use tablet-based hardware
- You feel comfortable with technology
- You don’t have a hard go-live deadline
It stops working when:
- Your catalog grows past 500 products
- You operate in a regulated industry (liquor, cannabis, vape)
- You run a restaurant with modifiers and a KDS
- You’re opening multiple locations or moving data from another POS
Vendor-Assisted POS Setup: What Your Vendor Handles for You
A specialist runs the project with you: onboarding calls, full data import, pre-configured hardware, tax and payment setup on a call together, live staff training, and a dedicated support contact for your first 30 to 90 days. It takes 1 to 3 weeks elapsed but only 3 to 8 hours of your direct involvement. Some vendors (including KORONA POS) include it free; others charge $200 to $2,000.
Vendor-assisted is the right path when:
- Your inventory is complex (1,000 or more SKUs)
- You’re rolling out multiple locations
- You operate in a regulated industry
- You’re moving data from another POS
- You have a fixed go-live date
DIY vs Vendor-Assisted: Which Path Fits Your Business?
Answer four questions:
- How many SKUs do you have? Fewer than 200 lean DIY. More than 500 lean vendors.
- How many locations? One leans DIY. Two or more leans vendor.
- Are you in a regulated industry? Liquor, dispensary, vape, tobacco, and food service are all lean vendors.
- How firm is your go-live date? Soft date leans DIY. Hard date leans vendor, since they absorb the timeline risk.
If three or four answers point to the vendor, go with the vendor. If three points to DIY, go DIY. If it’s split, the deciding factor is whether you can absorb a delayed opening.
Cloud or On-Premise POS Setup?
Before you start, confirm which kind of POS you bought. Most modern systems (KORONA POS, Square, Shopify POS, Toast, Lightspeed, Clover) are some of the best POS cloud-based: you log in through a browser or mobile app, hardware pairs over USB or Bluetooth, and updates push automatically. About 95% of small businesses run cloud.
If your POS is on-premise (also called “on-prem” or “legacy”), the software runs on a server at your business. Setup involves a technician install, wired connections between terminals, manual updates, and local data backups. Most modern small businesses don’t need on-premises, and most vendors don’t sell it anymore. If you bought one, the steps below still apply, but each takes longer and may require IT help.
The 8-Step POS Setup Process
You’ve handled your pre-setup checklist, picked your path, and confirmed cloud or on-premise. Now you’re ready for the actual setup. The eight steps below assume you’re on a cloud system. Follow them in order.
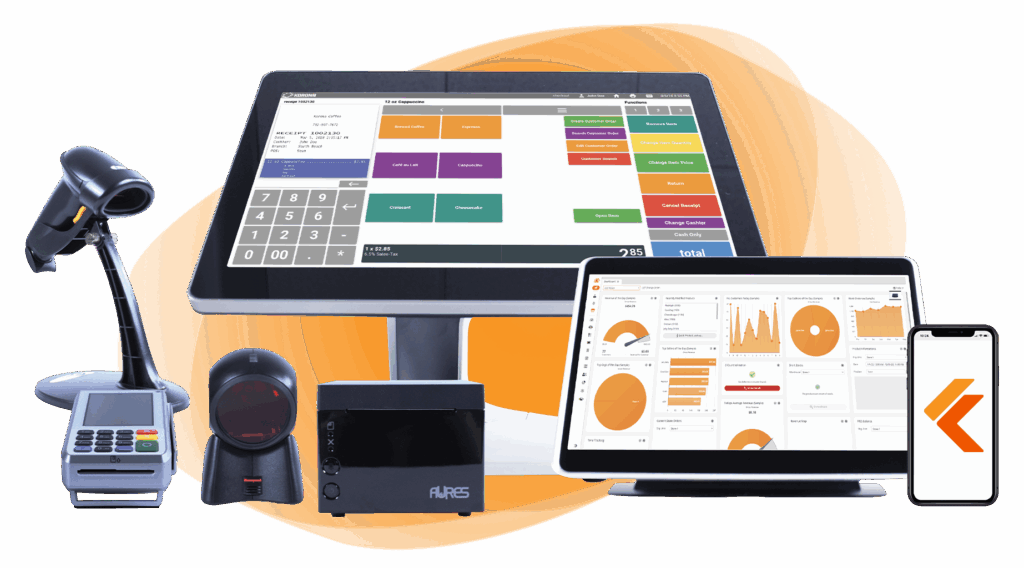
Step 1: Place and Connect Your POS Hardware
Lay out every piece of hardware where it will live: terminal, card reader, receipt printer, cash drawer, scanner, and customer display (if you have one). Mount the card reader within customer reach. Position the receipt printer close enough that cables reach with slack. The cash drawer cable plugs into the receipt printer (the printer triggers it to open). Connect the printer and scanner to the terminal over USB. Pair the card reader over Bluetooth or USB-C.
Build Your Own POS
Whether you run a retail store, café, or admissions booth, we have the point of sale hardware designed for your specific needs. Start building your ideal POS system now.
Step 2: Get Your POS Online and Powered Up
Plug everything into a UPS or surge-protected power strip. Skip the cheap strip from the dollar store. Use the terminal on business Wi-Fi or, better yet, wired Ethernet (wired is more reliable for card payments). Set up your backup connection (4G failover or hotspot) and test it before go-live, not during your first outage.
Step 3: Install or Log Into Your POS Software
On cloud systems, log in through a browser or open the POS app. Run the initial wizard (store name, time zone, basic preferences). Pin the app to the terminal’s home screen so staff can’t accidentally close it. Test sign-in, sign-out, and sign-back-in. Confirm the sync indicator shows green.
Step 4: Configure Your Business Settings
Open the POS back office. Enter business name, address, hours, time zone, and logo (for receipts and customer screens). Set tax rules by jurisdiction and product category. Design your receipt header, footer, and return policy. Choose tender types (cash, credit, debit, gift cards, mobile wallets). Set permission rules for refunds, voids, discounts, and manager overrides.
Step 5: Import Your Products or Menu
For retail: upload products with SKU, description, retail price, vendor cost, category, and starting stock. Add images if supported. Set reorder points. For restaurants: build the menu by category, add items, modifiers (no onions, extra cheese), and combos. Test how modifiers print on kitchen tickets. For ticketing: create ticket types, pricing tiers, capacity limits, and date ranges. Your vendor can handle the upload if you send a clean CSV.
Step 6: Connect Your Payment Processor
Link your merchant account using the API key or processor ID from your merchant services company. Configure your tender flow (accepted payment types, tip prompts, split payments). Run at least three test transactions: one cash sale, one chip card sale, and one refund. Confirm the money settles into your bank account the next business day.
Step 7: Add Employees and Set Permissions
Create accounts for every person who will use the POS. Assign roles: cashier, shift lead, manager, or owner. Cashiers ring sales, process refunds with approval, and clock in. Shift leads can open the till, void items, and run end-of-day reports. Managers adjust prices, edit inventory, and override locks. Owners get full back-office access. Assign each person a PIN or fingerprint login so staff don’t share credentials.
Step 8: Connect Your Integrations
Connect the other software you use: accounting (QuickBooks, Xero), eCommerce (Shopify, WooCommerce, BigCommerce), loyalty programs, and gift card platforms. Each usually involves logging into the other platform, generating an API key, and pasting it into your POS settings. Test each one by running a sale and confirming it shows up where it should. Skip any you don’t need yet.
Test Your POS Before Go-Live
Don’t open the doors until you’ve run real tests. Real merchants have launched POS systems before they were ready and watched their first card transaction decline, their receipts print blank, or their tax rates apply to the wrong items.
Run through every payment and refund scenario at least once: cash sale, chip card sale, contactless tap, split tender, full refund, partial refund, void, discount applied, and tax-exempt transaction if relevant. Check each transaction against your sales report. The totals must match.
Test hardware under real conditions. Print a long itemized receipt (paper jams reveal themselves at length), trigger the cash drawer from an actual completed sale (not a test button), scan 10 barcodes in quick succession, and print kitchen tickets if you have a KDS.
Verify your reports. Run an X report mid-shift, a Z report at the end of your test session, and the daily sales summary. Tax collected should match what you charged. Inventory should deduct when you sell. Settlement should hit your bank the next business day.
Test failure modes. Disconnect the internet and try to ring a sale, then reconnect and confirm it syncs. Sign in as a cashier (not as the owner) and try to void a sale, change a price, or access the back office. Those should be blocked. If they’re not, your permissions are misconfigured.
PRO TIP
If anything fails, fix it before you go live.
Train Your Team Before Go-Live
Most POS setup failures aren’t software failures. They’re training failures. Train your team properly and most day-one problems disappear.
Run training with the store closed, not during open hours. Cashiers need to do five things well: ring a sale, process a refund, handle multiple payment types, apply discounts, and respond when something goes wrong. Walk them through cash sales, chip cards, contactless taps, and split tenders. You ring the first one; they ring the next three. Then drill refunds, voids, and discounts twice each.
Cover the failure scenarios: internet drops mid-sale, card declines, printer jams, customer disputes, terminal freezes. For each, the cashier should have a short script: what they do, what they say, when to call a manager. End by showing the help screen, support phone numbers, and a printed cheat sheet you’ll tape to the back of the terminal.
After cashier training, pull managers aside for the back-office work: X and Z reports, inventory adjustments, price edits, permission overrides, till close, and settlement reports. Have them do each task once with you watching, then teach one back to you. If they can teach it, they know it.
Three mistakes cause most day-one training failures:
- Training during open hours. You can’t focus, your trainees can’t focus, and real customers interrupt.
- Lecturing instead of doing. Hands on the terminal beats eyes on a screen.
- Skipping refund and void training. Refunds are the most common screw-up on day one.
Schedule a refresher 7 to 14 days after go-live, once your team has seen real customers and has specific questions.
Your POS Go-Live Day Checklist
Go-live day is for execution, not problem-solving. Before customers walk in, confirm:
- Every terminal is powered on, signed in, and synced to the cloud.
- The card reader is paired and verified with a test tap.
- The receipt printer is loaded and prints clean.
- The cash drawer is counted and the starting float is logged.
- Primary internet is confirmed with a live card transaction.
- Backup internet is on and verified.
- All employees are clocked in, PINs work, and the cheat sheet is at the register.
- Support phone numbers (POS vendor and payment processor) are posted at the register.
- A manual fallback (carbon-copy slips or written log) is within reach.
- A manager or owner is physically on site for the opening.
If something on the list isn’t ready, delay opening if you can.
Warning
A late opening is a story your staff will tell once. A botched go-live is a problem you’ll spend weeks fixing.
7 POS Setup Mistakes That Cost Merchants Money
Most setup mistakes don’t surface on go-live day. They show up weeks or months later, in the form of bad reports, missed sales, vendor lock-in, or a tax audit letter.
Not comparison-shopping your payment processor. Bundled processing rates are often 0.3 to 1 percentage point higher than what an independent processor would charge.
Did You Know
On $500,000 in annual card volume, that’s $1,500 to $5,000 a year, every year.
Misconfiguring your tax rules. Undercharge and you owe back taxes plus penalties. Overcharge and you owe customer refunds. Have your accountant or POS vendor review your tax configuration before go-live.
Giving cashiers manager-level permissions. Require a manager PIN for anything that affects price, inventory, or back-office data.
Warning
The fastest way to lose inventory is to let every employee adjust prices, void sales, and edit stock counts.
Importing products without categories or reorder points. A flat product list with no minimums turns your POS into a glorified cash register. You can’t run department reports or trigger reorder alerts. Spend the extra hour during import.
Skipping the backup internet connection. A failover hotspot costs $20 to $50 a month. One Saturday outage costs more.
Warning
A cloud POS without backup is one outage away from a closed business.
Going live on a peak day. Don’t open Friday afternoon, the day before a holiday, or during a promotion you’ve already announced. A quiet Tuesday gives you room to troubleshoot.
Skipping the settlement test. Before go-live, run real card transactions and confirm the money lands where it should, when it should. Catching settlement problems after opening, with payroll due, is a cash flow crisis.
POS Setup by Business Type
Generic POS setup guides assume basic retail. If you’re not, certain steps carry extra weight.
Liquor Stores
Liquor stores add three things to standard retail setup: age verification on every alcohol sale, ABC and state liquor compliance reporting (inventory tagged by category, like beer, wine, and spirits), and case-break pricing so you can sell a 12-pack as a unit, a 6-pack, or a single bottle without manual repricing.
Convenience Stores
Convenience has the highest SKU count of any small retail format. Plan for 2,000 to 10,000 products at import. Configure lottery integration (if you sell tickets), fuel pump integration (if you have pumps), age-prompt rules on tobacco and alcohol SKUs, and SNAP/EBT split-tender logic if you sell food. For high-velocity items, consider RFID inventory tracking to cut manual counting time.
Dispensaries
Cannabis POS setup is dominated by state compliance. Most legal states require integration with seed-to-sale tracking (Metrc in most states, Leaf or BioTrack in others). Add weight-based pricing for flowers, separate tax rules for recreational vs. medical use, and patient ID verification. All of it is required by law. Get a vendor with cannabis experience.
Vape and Smoke Shops
Vape and smoke shops need age verification on every transaction, PACT Act compliance if you sell online or ship, and bundle pricing for common SKU groupings (cartridge, battery, and coil). If you also sell CBD products, you’ll need specialized payment processing since most traditional processors won’t handle hemp-derived items. Build state-specific tax rules carefully, since many states tax vape products differently from cigarettes.
Quick-Service and Coffee Shops
Quick-service and coffee shops live and die by menu engineering. Build categories (drinks, food, sides), then items, modifiers (size, milk, syrup), and combos. Test how modifiers fire to your KDS or kitchen ticket printer. Configure tip pooling if your team shares tips. Set up day parts if your menu changes between breakfast, lunch, and dinner.
Ticketing and Events
You’re not selling items off a shelf. You’re selling time slots, capacity, and access. Configure ticket types, pricing tiers (adult, child, senior, member), capacity limits per session, and date ranges. Set up scanning workflows for entry. Test the full purchase-to-entry flow before opening.
Multi-Location Operators
A multi-location setup adds centralized inventory across stores, enabling transfers between them. Reports must roll up to the company level and drill down to the store level. Add a regional manager permission tier above store manager. Set up your master store first, get it right, then clone the setup. Don’t try to set up two stores in parallel.
How to Migrate from Your Old POS
Switching POS systems while running an active business is harder than starting fresh. You’re carrying years of products, customers, gift cards, and history into a system that may organize data differently.
Export Your Old POS Data Before You Cancel
The number one migration mistake is canceling your old POS subscription before exporting. Many providers cut your access immediately, and your data goes with it. Export at least two weeks before cutover:
- Product catalog (SKUs, prices, categories, vendor info, stock levels)
- Customer database (contact info, purchase history, loyalty balances)
- Active gift card balances with serial numbers
- Open purchase orders and supplier info
- 12 months of sales history for tax reference
Most systems export to CSV. If yours doesn’t, ask support for a bulk export before canceling.
Handle Gift Cards During the Switch
Gift cards are the trickiest part. Your new POS won’t recognize old card numbers unless you import them. You have three options, cleanest to messiest:
- Import balances into the new POS. Send your export to your new vendor before cutover. Most can import them so old cards still work.
- Reissue new cards. Contact every holder and issue new cards through the new system. Painful, but clean.
- Honor old cards manually. Keep a printed list at the register and deduct as customers redeem. Use only as a temporary bridge for two to four weeks.
Pro Tip:
Don’t punt on gift cards. A gift card disaster is the fastest way to lose long-term customers.
Parallel Run or Hard Cutover?
A parallel run means both POS systems are live at once. You get a fallback if the new system fails, but you carry a doubled training burden, messy inventory tracking, and the cost of two systems.
A hard cutover means you close one day on the old system and open the next on the new one. Clean break, no doubled costs, no staff confusion. But no fallback if day one fails.
For most small and mid-sized merchants, a hard cutover with thorough testing is the right choice. Schedule it for your slowest day of the week, usually Tuesday or Wednesday morning.
Plan for What Won’t Carry Over
- Older sales history beyond what you import as CSV
- Custom workflows and shortcuts your old system had
- Integration history with QuickBooks, Shopify, and other tools
- Loyalty tier rules and accrual formulas
- Employee performance reports from the old system
Keep archived old reports for tax purposes before you cancel.
The First 30 Days After POS Go-Live
The first 30 days are when small problems become big ones if you don’t catch them.
Week 1: Monitor and catch problems. Watch the register during peak hours. Listen for hesitation, mis-rings, and “the system did something weird” comments. Each evening, check sales totals by terminal, settlement, unusual voids or refunds, and recurring staff questions (those are training gaps or UX problems worth fixing).
Week 2: Verify inventory and settlement. Pick your top 20 highest-volume SKUs and physically count them. Compare to what your POS inventory system says. If numbers don’t match, find out why. Verify every card sale appears in your bank deposits, minus processor fees. If anything doesn’t tie, call your payment processor now, not next month.
Week 3: Optimize based on real usage. Are there products buried where staff can’t find them quickly? Move them. Are there modifiers no one uses? Delete them. Do permission locks slow down legitimate workflows? Adjust the rules. Are reorder points triggering too early or too late? Recalibrate. Add the integrations you skipped during setup.
Week 4: Review and plan. Pull a full-month sales report. Look at total revenue, sales by category, sales by employee, sales by day and hour, and average ticket size. Plan the next 60 days: which features haven’t you used yet (loyalty, email marketing, self-checkout, multi-location reporting)? Book a 30-day check-in with your POS vendor.
FAQ: How to Set Up a POS System
How long does it take to set up a POS system?
A self-serve setup for a single-register tablet POS takes 4 to 8 hours of active work. A vendor-assisted setup for a more complex business takes 1 to 3 weeks of elapsed time but only 3 to 8 hours of your direct involvement. Larger catalogs, multiple locations, and regulated industries add time.
Can I set up a POS without an IT person?
Yes, for most cloud systems. Setup is designed for non-technical owners: web signup, app install, plug-in hardware, CSV upload. You may want IT help if you’re running on-premise software, wiring multiple terminals, or migrating a large product database.
Can I use my existing hardware with a new POS?
Sometimes. Receipt printers, cash drawers, and barcode scanners often work across systems if they support standard connections. Card readers usually don’t; they’re tied to specific payment processors and POS software. Send your hardware list to your new vendor before signing up.
How much does it cost to set up a POS?
Cloud POS subscriptions usually include setup free or charge $200 to $2,000 for onboarding. Hardware ranges from $300 (a single tablet with a card reader) to $3,000 or more (a full register with printer, drawer, and scanner). Payment processing fees are ongoing, typically 2 to 3 percent per card transaction.
Can I switch POS systems without losing data?
Mostly. Your product catalog, customer database, and active gift card balances can usually be exported and imported. Historical sales reports and custom workflows often don’t transfer cleanly. Export everything before you cancel your old subscription
How KORONA POS Handles Your Setup
KORONA POS is built around one idea: your vendor should do the hard parts, not you. Setup includes free onboarding with a dedicated specialist, hardware shipped pre-configured, full data import handled by our team, expertise in liquor, dispensary, convenience, vape, ticketing, QSR, and multi-location operations, independent payment processing (we help you find the best rate), 24/7 in-house support, and a free trial account that mirrors what your real account will look like.
Setup takes 1 to 3 weeks of elapsed time and 3 to 8 hours of your direct involvement. By the time you go live, your hardware is ready, your team is trained, and your data is in place.
Get a free trial account, no credit card required. We’ll upload your product data and walk you through a personalized demo of the features you actually need. Start your free trial or schedule a personalized demo.